User Guide
Dedicated to the memory of my mother Bayadaa Tangad
- Download installation package from our server or www.download.com.
- Run the Installer.
Steps to use the software:
1. You need obtain special bubble sheets designed for the software's current version. Visit to www.physics-software.com/getsheet and print copies (of course free of charge) as you need.
Please do not use bubble sheets from previous versions saved locally on your computer. Because there may exist differences between coordinate offsets that will lead to wrong grading result.
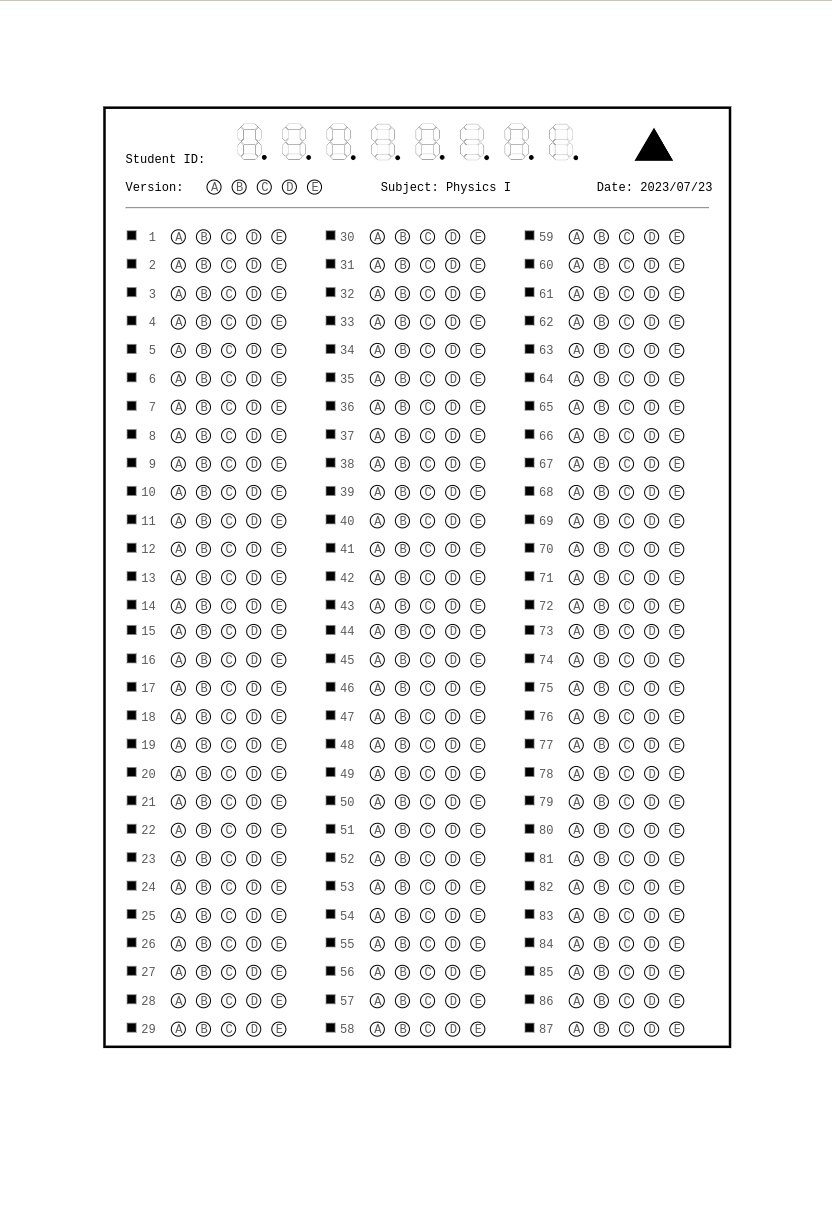
An example bubble sheet
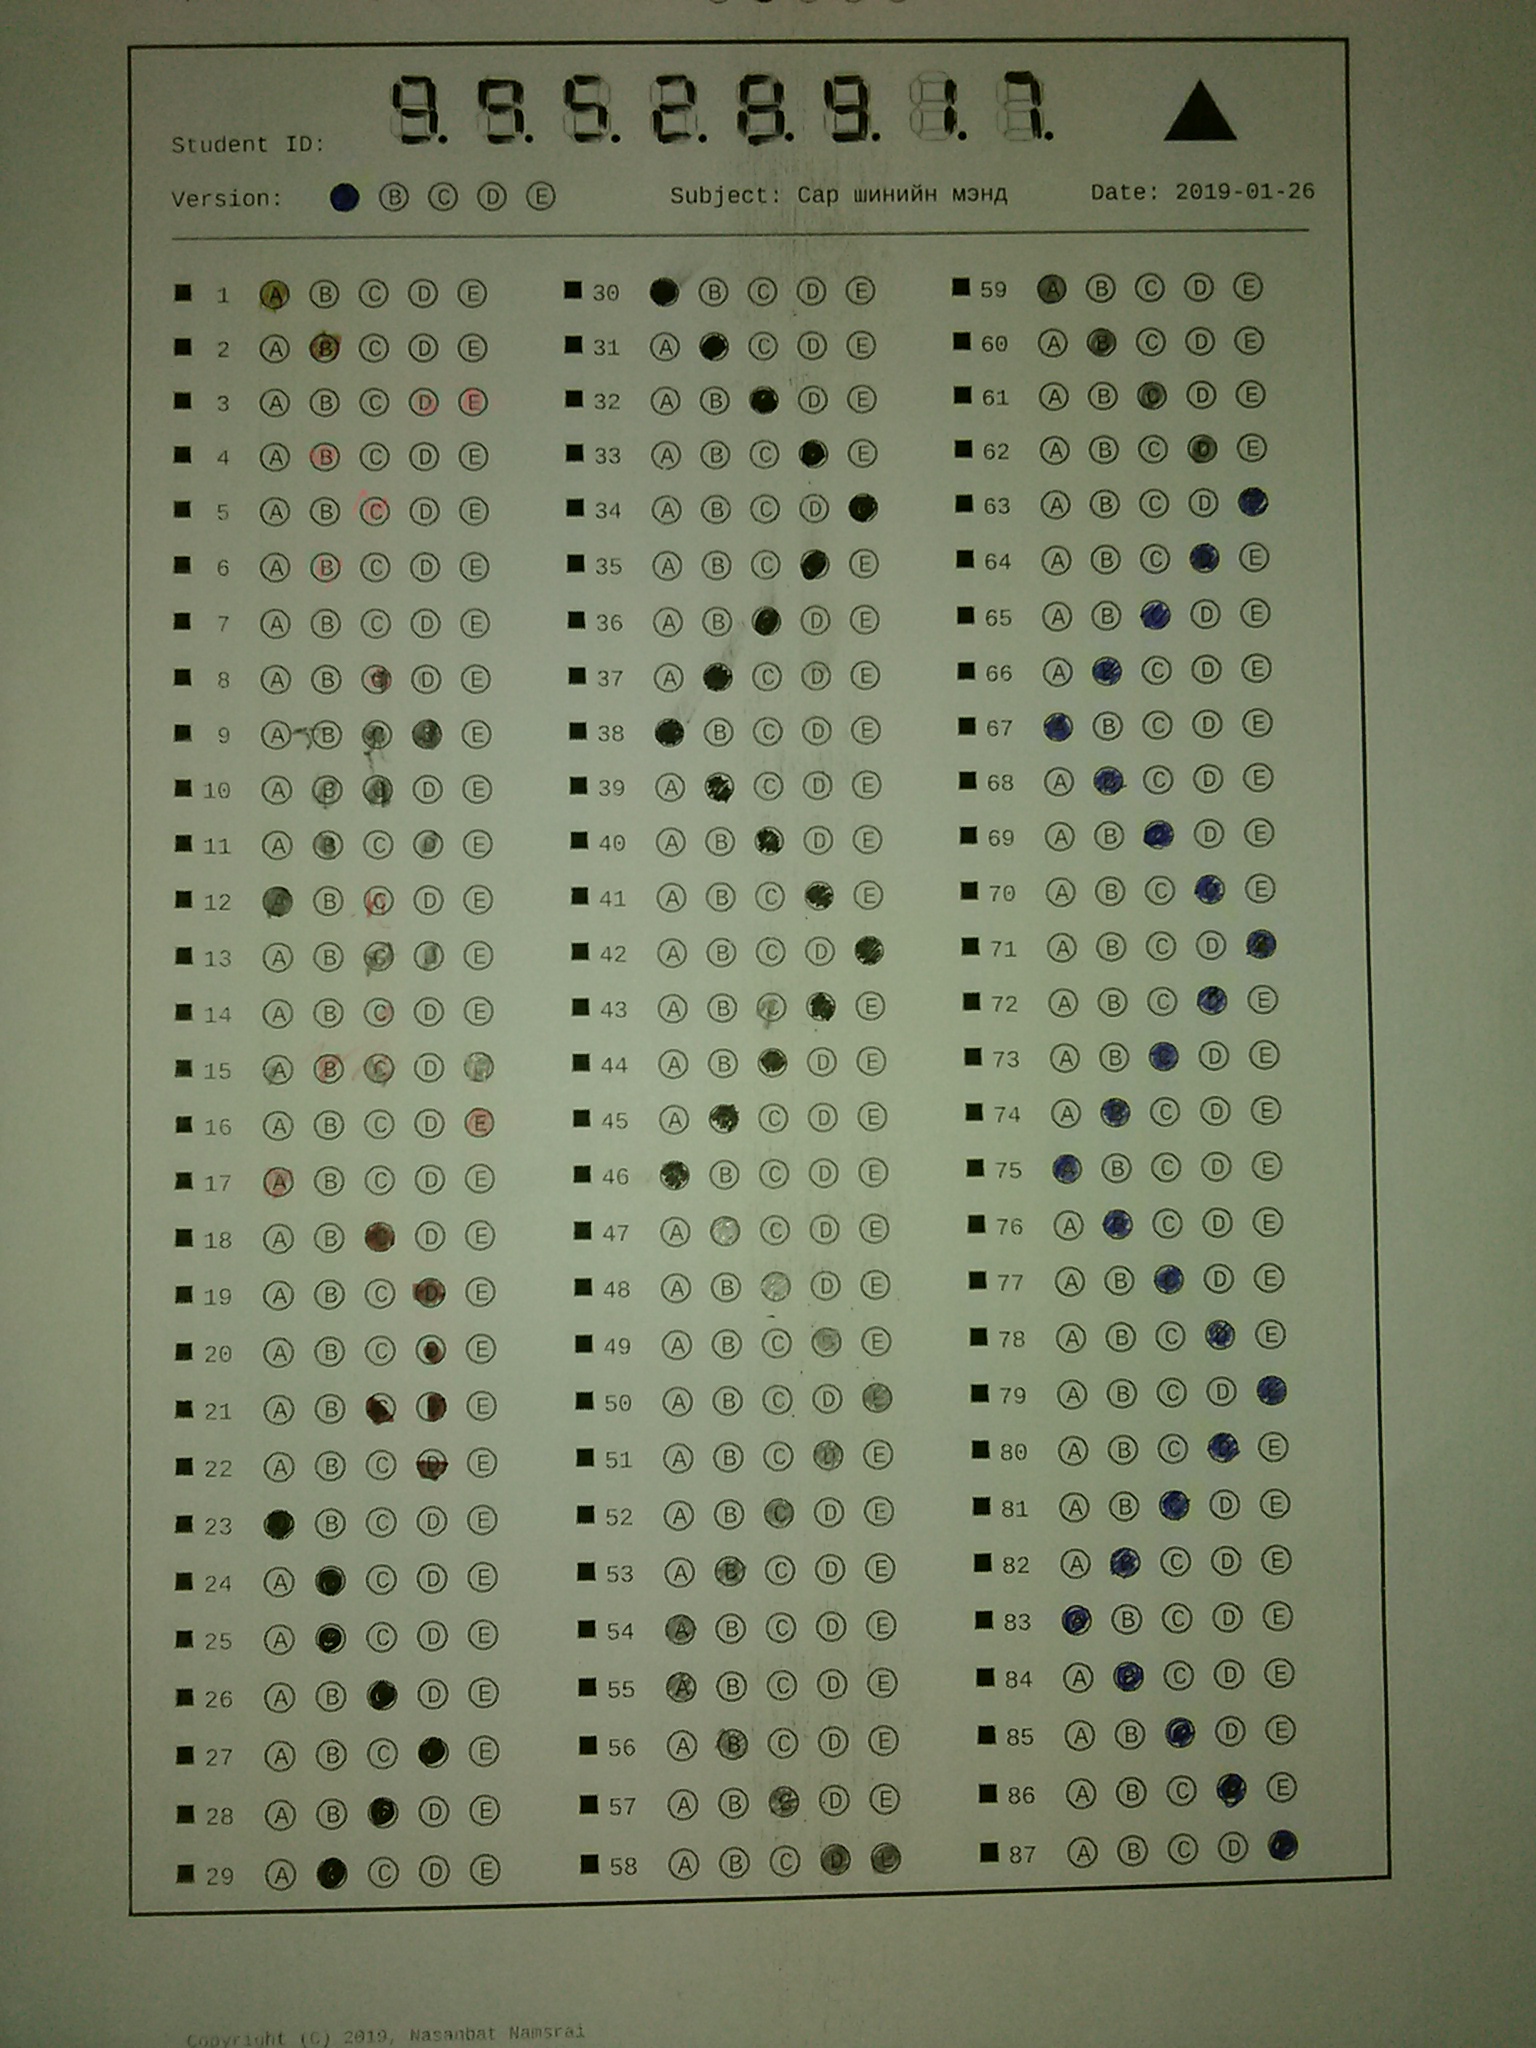
2. Your students should fill their ID on the 7 segment digits on the upper side of the bubble sheet. Students' ID must be consists of 8 digits. For example 00000001, 00000002, 12345678 ... so on. Any other markings and scratches on the bubble sheet's scan area will cause malfunctioning of the software. Your students may use pen, marker, ball pen and soft lead pencils to fill answer sheet.
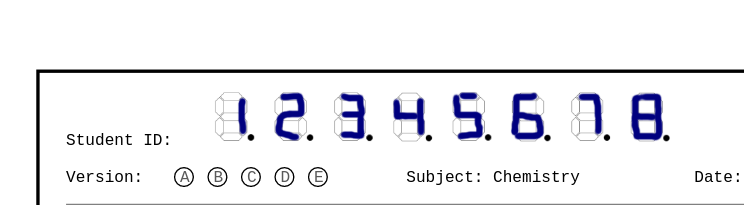
Filling Student ID is EASY.
3. You have to enter key. There are methods to enter keys:
a. You can directly enter key and respected points and penalties on the table located left
side of
the
application's main window. There is also a feature save the answer keys for later use. Choose
File|Scan Key command from the menu.
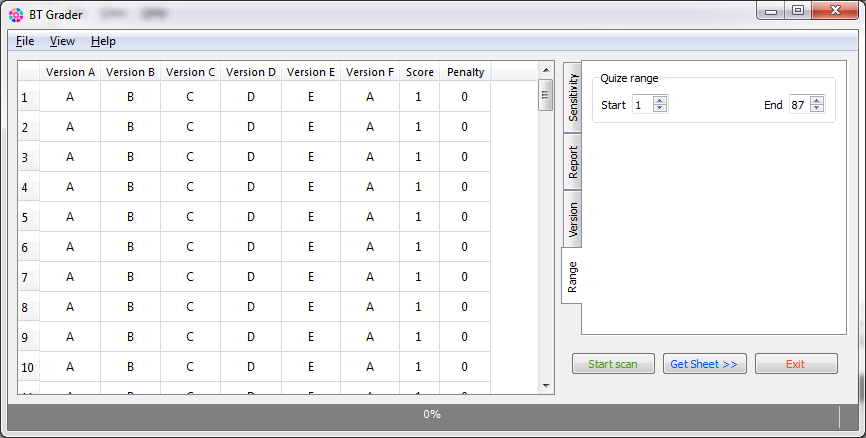
Main Window of BT Grader. Answer keys should filled in table located left side of the window.
b. You can load prepared key (*.can) file before scan. Keys will be also automatically filled on the left side table of main window. Refer an example *.can file for correct structure or simply replace by keys of the current exam. Please, do not enter any additional white space between columns. The file will found in installation folder of the application.
c. You can scan a bubble sheet with key answers. The software supports scan of multiple version answer sheet. If the examine has multiple version you need enter key for each version separately. In case of single version answer sheet you have to fill only A column, you student should fill A on "Version:" section of the bubble sheet. Be green! 🙂 You can use a bubble sheet twice or more times, adjusting starting and ending number of quiz. Make sure there is no overlapping end of previous quiz number and beginning number of current quiz if you are using same sheet for series of exam.
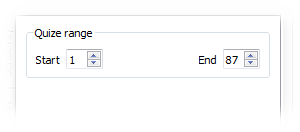
Setting range of the quiz
4. Take pictures of bubble sheet after the examine using camera, smart phone or scanner. You do not need to sort or collate even rotate the sheet for aligning header. Edge of your picture should lay between page margin and scan area. It is very important! Picture edge is shown by green rectangle. See following image. The most convenient picture size is 2048×1536. Smaller picture is error prone, bigger picture requires more computer resource.
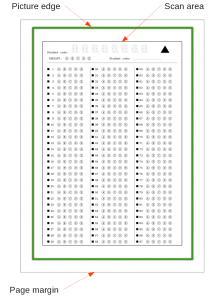
Picture edge
5. Copy pictures of quizes into a new folder on your computer.
6. Push the Start scan button and select and open the folder created in Step 5. Percentage of processing and name of picture files will appear on status bar. Scanning is intensive process, so you cannot exit from the software while it is running. Please do not change any configuration until it finishes.
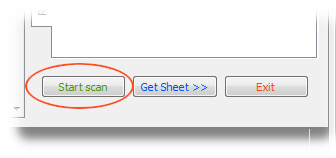
Push Start scan button to grade quizes
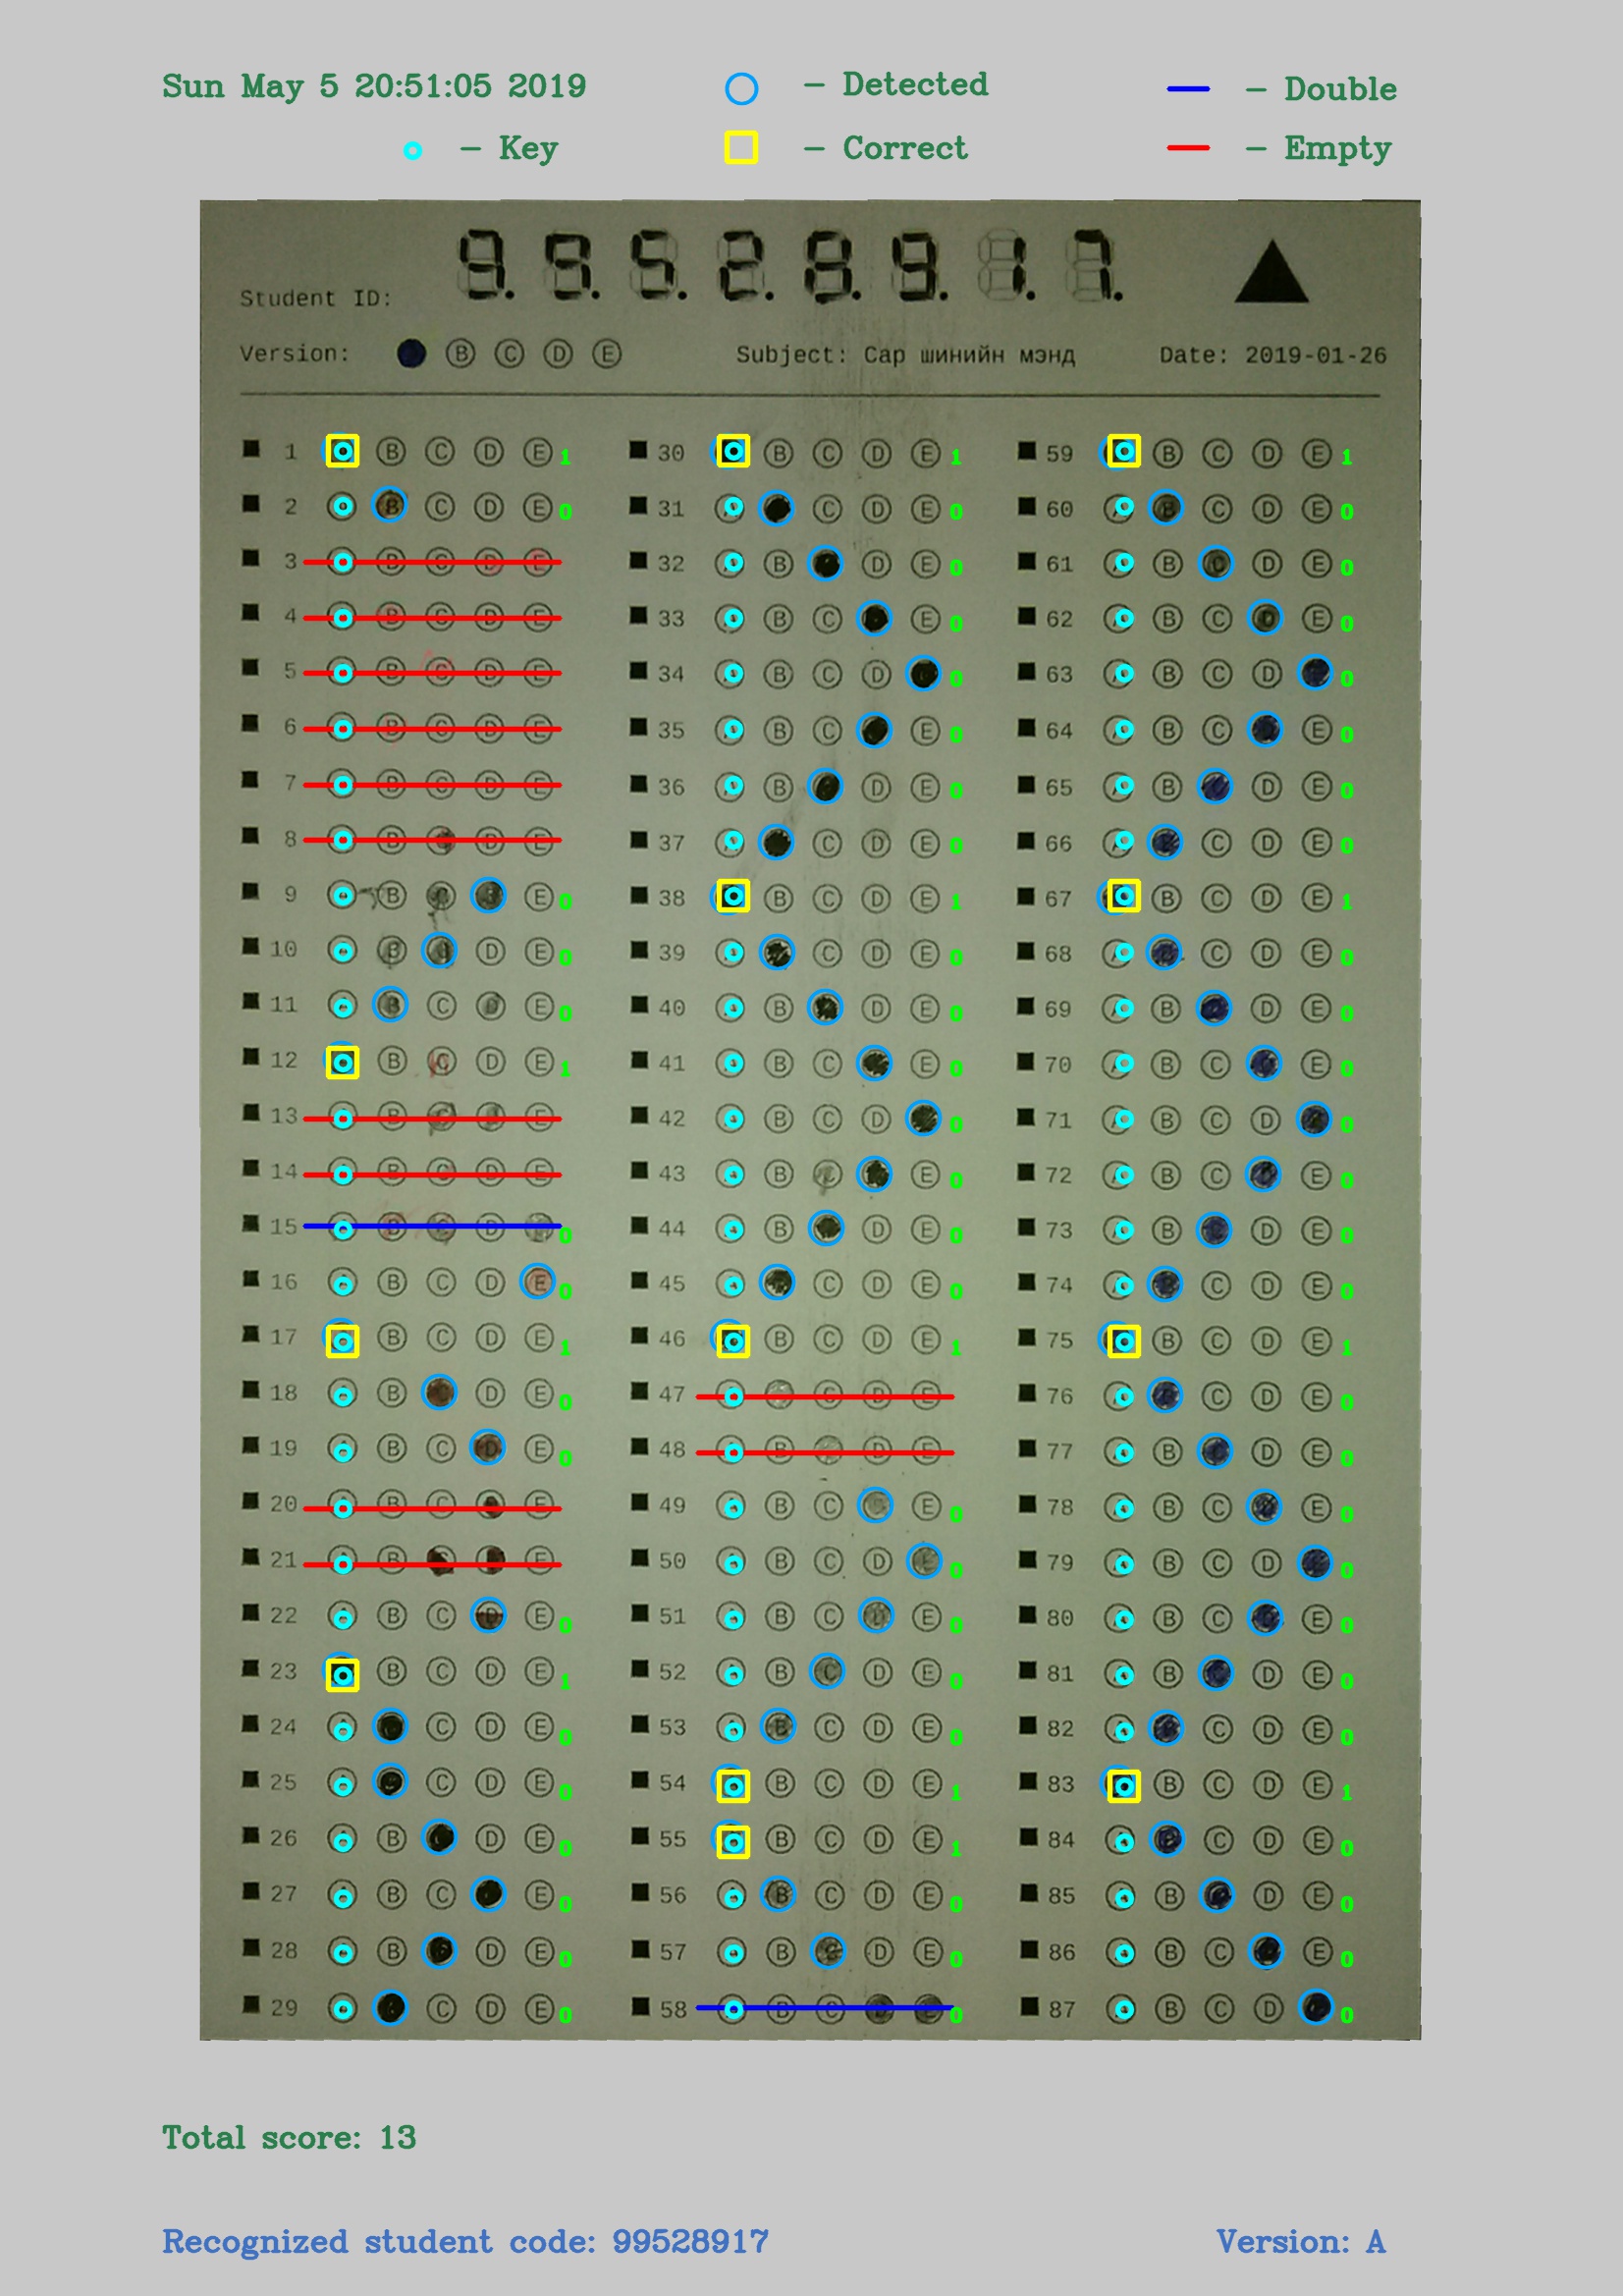
7. While processing of answer sheets, copies of scanned pages will be saved as JPG image. Please check these images if you have any doubt about scan result. If there are errors, misidentifies please try change Sensitivity of corresponding field(s). If your pictures blurry, or bad lightened you mostly need decrease sensitivity.
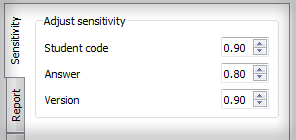
Adjusting sensitivity
Specifications
Release Date:July 17, 2019
Date added: July 17, 2019
Version: 1.1.2
Operating systems:
Windows 7/ Windows 8/ Windows 10/ Windows 11/Windows Server 2016
Screenshots: